emqx/ekuiper-manager repository overview
Getting Started
eKuiper manager is the preferred eKuiper management web console provided by EMQ. Users can use it to manage one to many ekuiper instances and it is totally free of use. It can manage the whole life cycle of ekuiper rules. As long as it can connect to the rest port of ekuiper, it can be installed with ekuiper on the same machine or separate machines. Starting from download and installation, this document will guide you to run the first rule with ekuiper and ekuiper manager by web UI.
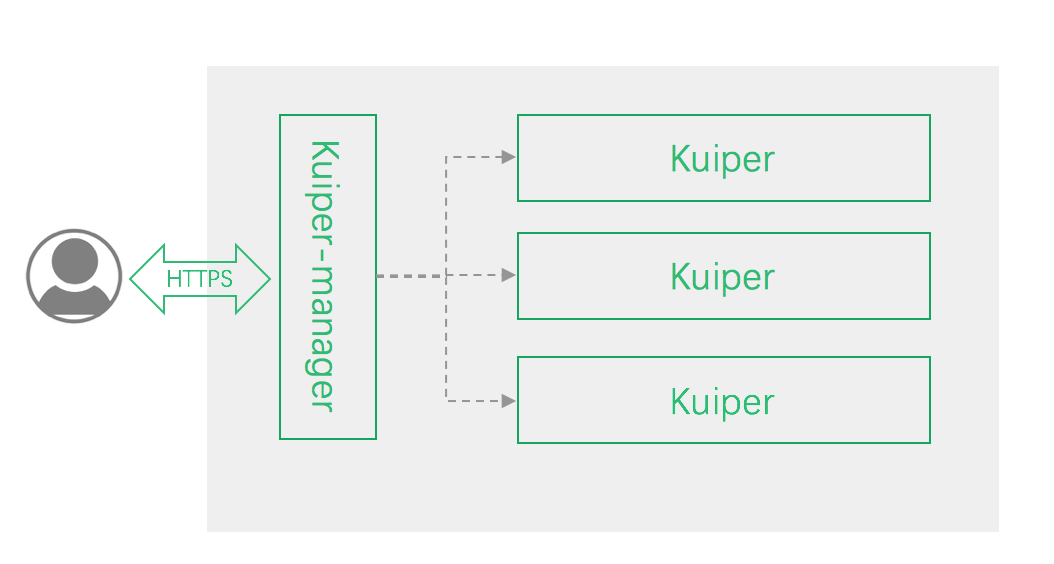
Architecture design
- UI end: a visual interface, easy for users to operate
- eKuiper manager: Management console, which essentially is a reverse HTTP proxy service, providing the services of user management, permission verification. It can be deployed in the cloud or at the edge
- eKuiper instance: managed eKuiper node instance, eKuiper manager can manage multiple eKuiper nodes at the same time
Install
eKuiper and ekuiper manager provide docker image. download them by following commands
  docker pull emqx/ekuiper-manager:1.8.0

  docker pull lfedge/ekuiper:1.8.0
Run
docker-compose
we recommend use docker-compose to run them, following is the yaml deployment file.
version: '3.4'

services:
  manager:
    image: emqx/ekuiper-manager:1.8.0
    container_name: manager
    ports:
      - "9082:9082"
    restart: unless-stopped
    volumes:
      - /tmp/manager_data:/ekuiper-manager/data
    environment:
      DEFAULT_EKUIPER_ENDPOINT: "http://ekuiper:9081"
  ekuiper:
    image: lfedge/ekuiper:1.8.0
    ports:
      - "9081:9081"
    container_name: ekuiper
    hostname: ekuiper
    restart: unless-stopped
    user: root
    volumes:
      - /tmp/data:/kuiper/data
      - /tmp/log:/kuiper/log
    environment:
      MQTT_SOURCE__DEFAULT__SERVER: "tcp://broker.emqx.io:1883"
      KUIPER__BASIC__CONSOLELOG: "true"
      KUIPER__BASIC__IGNORECASE: "false"
docker directly
user can also manage the docker containers manually.
ekuiper:
docker run -d -p 9081:9081 --name kuiper -e MQTT_SOURCE__DEFAULT__SERVER="tcp://broker.emqx.io:1883" lfedge/ekuiper:1.8.0
ekuiper-manager:
docker run -d -p 9082:9082 -e DEFAULT_EKUIPER_ENDPOINT="http://127.0.0.1:9081" emqx/ekuiper-manager:1.8.0
Login
Login to kuiper-manager
You need to provide the address, user name, and password of kuiper-manager when logging in, which is shown below:
-
Address:
http://$yourhost:9082 -
User name:
admin -
Password:
public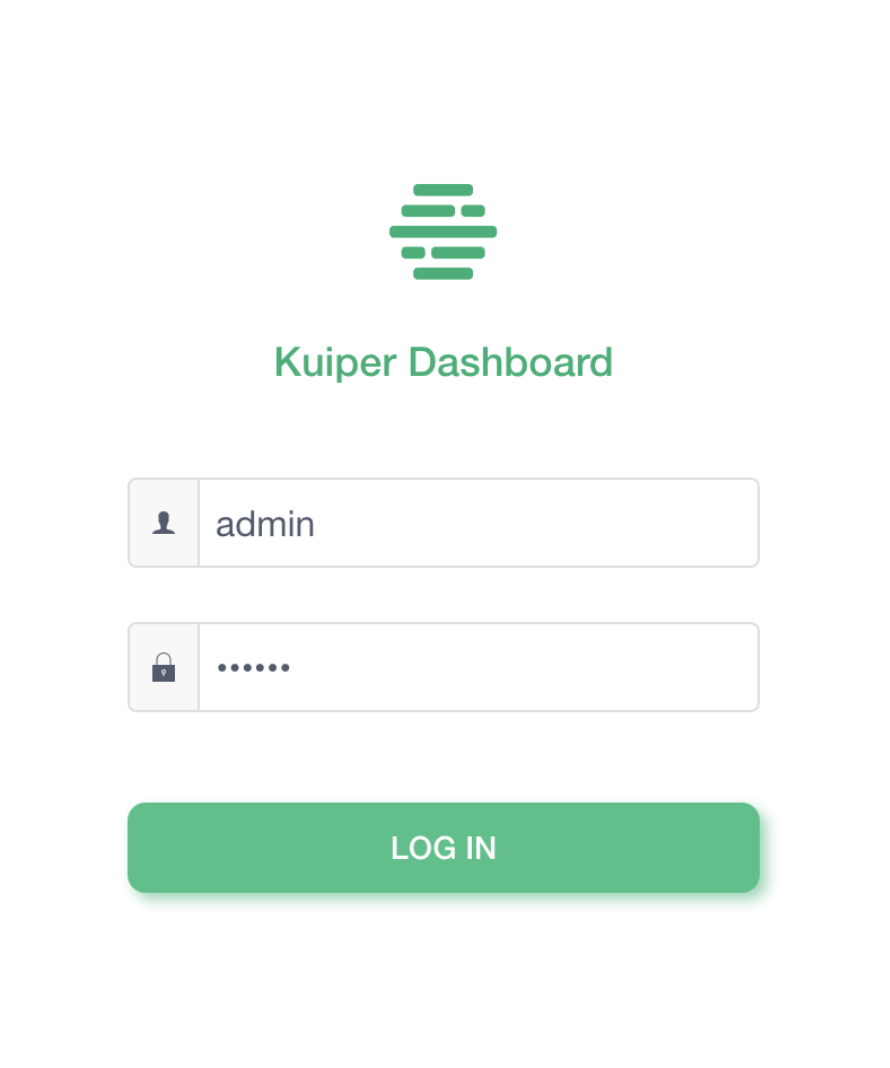
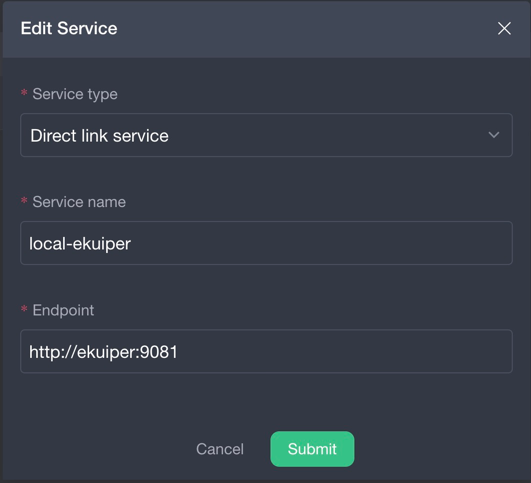
Create a eKuiper service
We have configured an ekuiper instance by above step. You can change the environment variable DEFAULT_EKUIPER_ENDPOINT and restart ekuiper manager to change the ekuiper endpoint url.
Create and manage the first rule
Prerequisite
We assume there is already a MQTT broker as the data source of our eKuiper rule. If you don't have one, EMQX is recommended. Please follow the EMQ Installation Guide to set up a mqtt broker.
You can also use the public MQTT test server tcp://broker.emqx.io:1883 hosted by EMQ.
Remember your broker address, we will use it in our MQTT configurations in this tutorial.
Scenario
Let's consider a sample scenario where we are receiving temperature and humidity event from a sensor through MQTT service, and we want to issue an alert when the average temperature is bigger than 30 degree Celsius in a time window. We can write an eKuiper rule for the above scenario using the following several steps.
- Create a stream to define the data source that we want to proceed. The stream needs to have a name and an optional schema defining the data structure that each incoming event should contain. For this scenario, we will use an MQTT source to consume temperature events.
- Create the rule to define how to proceed the stream and the actions after proceed.
- Get the rule status and manage it like start, stop and delete.
Defining the stream
- In Source/Stream page, click
Create streambutton. - Create a stream named
demowhich consumes MQTTdemotopic as specified in the DATASOURCE property. The MQTT source will connect to MQTT broker attcp://broker.emqx.io:1883. If your MQTT broker is in another location, clickAdd configuration keyto set up a new configuration and use.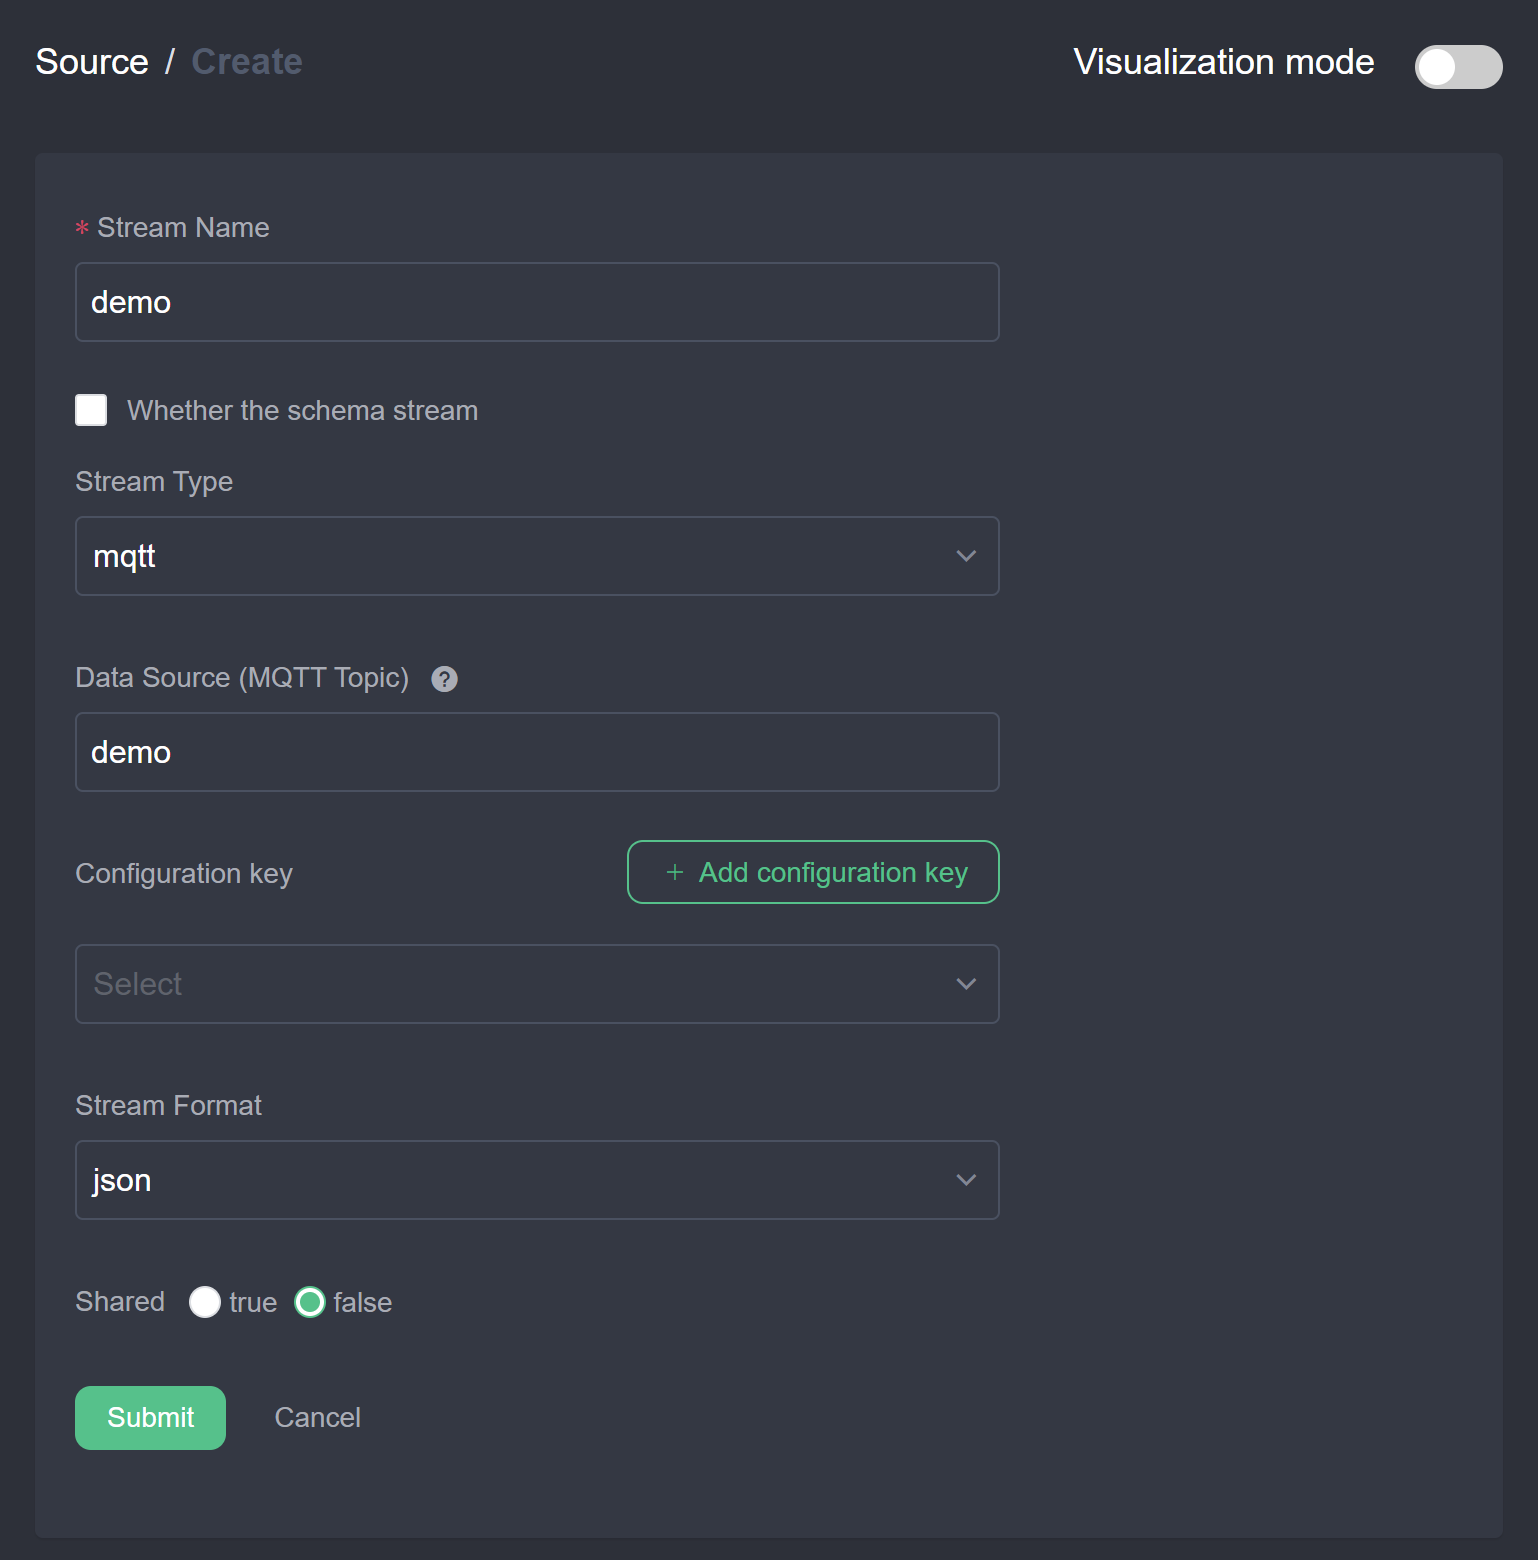
- Click
Submit. You should find thedemostream in the stream list.
Compose the rule
- Go to Rules page, click
Create rule. - Write the rule id, name and SQL as below. Then click
Addto add actions. The SQL isSELECT count(*), avg(temperature) AS avg_temp, max(humidity) AS max_hum FROM demo GROUP BY TUMBLINGWINDOW(ss, 5) HAVING avg_temp > 30.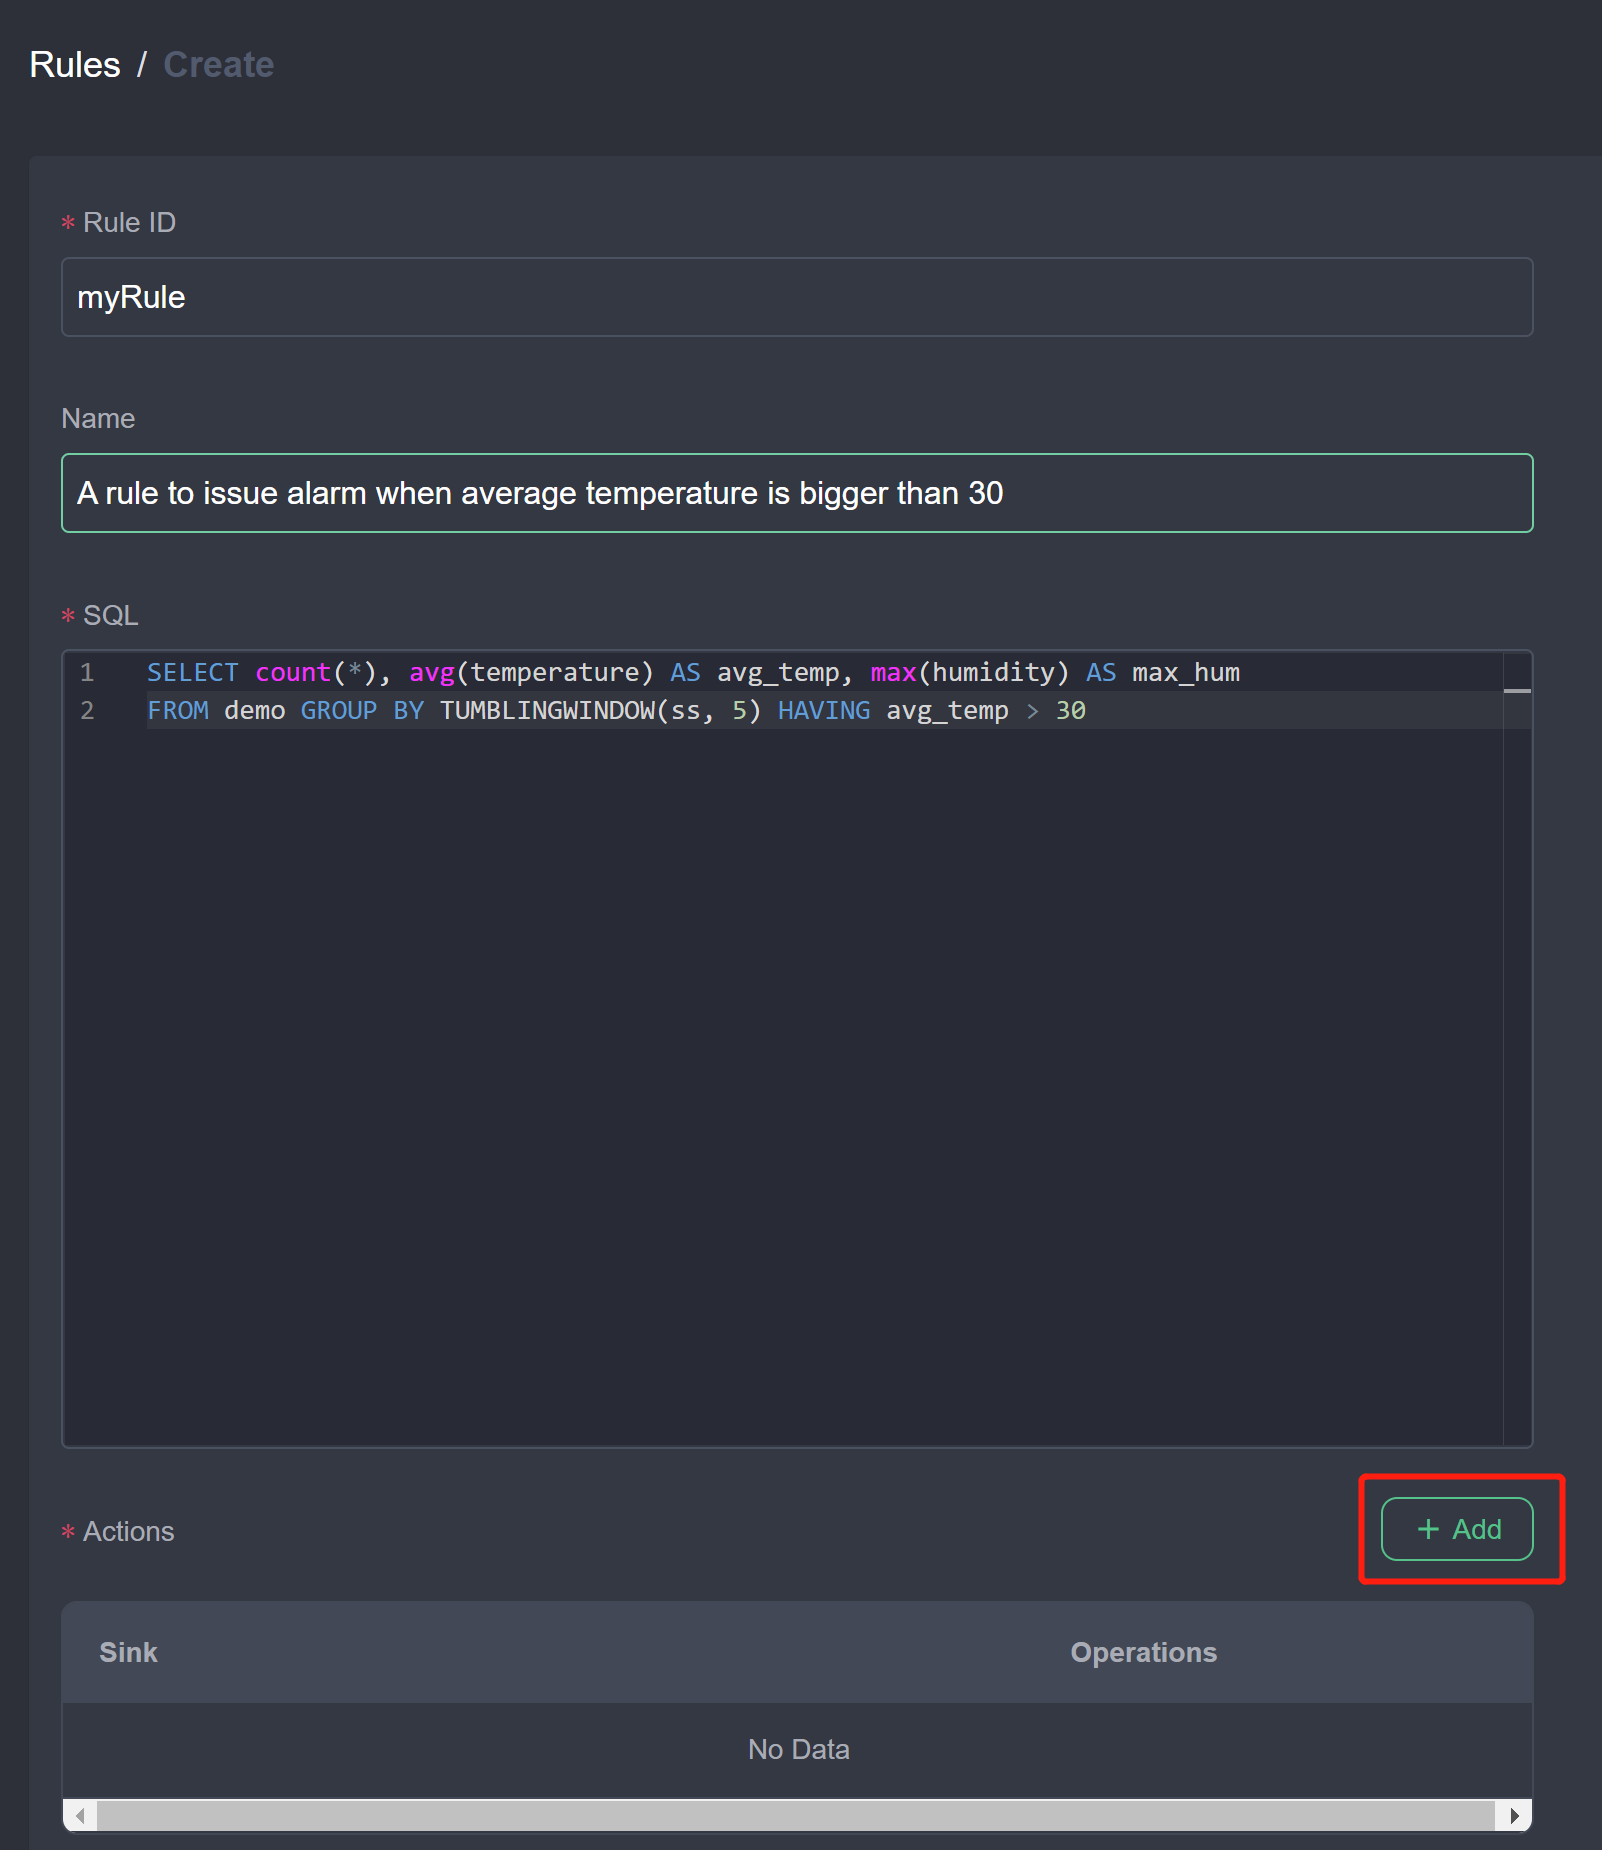
- Add MQTT action and fill in the configurations as below. Select
mqttin the Sink type dropdown. Set the broker address to your broker and set the topic toresult/rule1. ClientID is optional, if not set an uuid will assign to it. If set, please make sure the id is unique and only use in one rule. Set the other properties like username, password according to your MQTT broker setting.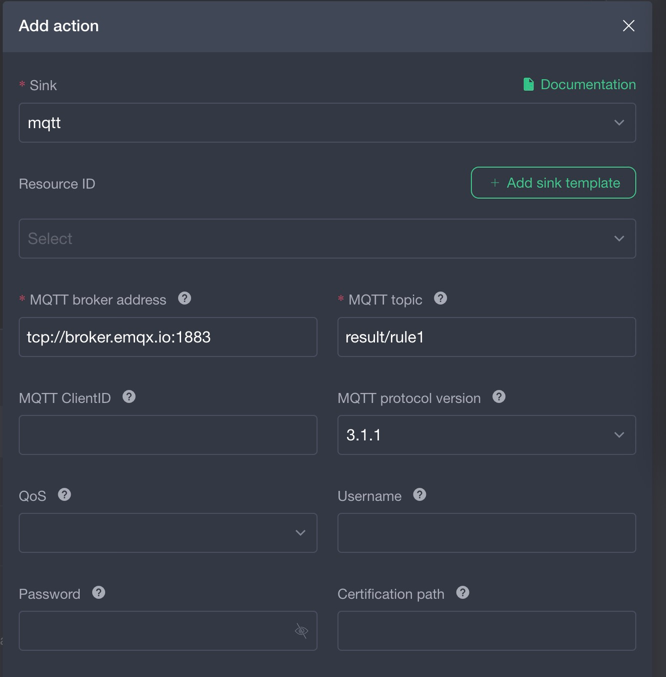
- Click
Submit. You should find themyRulerule in the rule list and started.
By now, we have created a rule by specifying SQL as the logic, and add one MQTT action. As you could see, the actions could be multiple, you can add more actions like log, REST and file to issue the alarm.
Manage the rule
In the Rules page, we could find all the created rules and its status as below.

You can start or stop the rule by touching the switch button. In the Operations column, the second operation is status, which will show the running status and metrics of the rule. Once the data source has data in, you should find the metrics number rising.
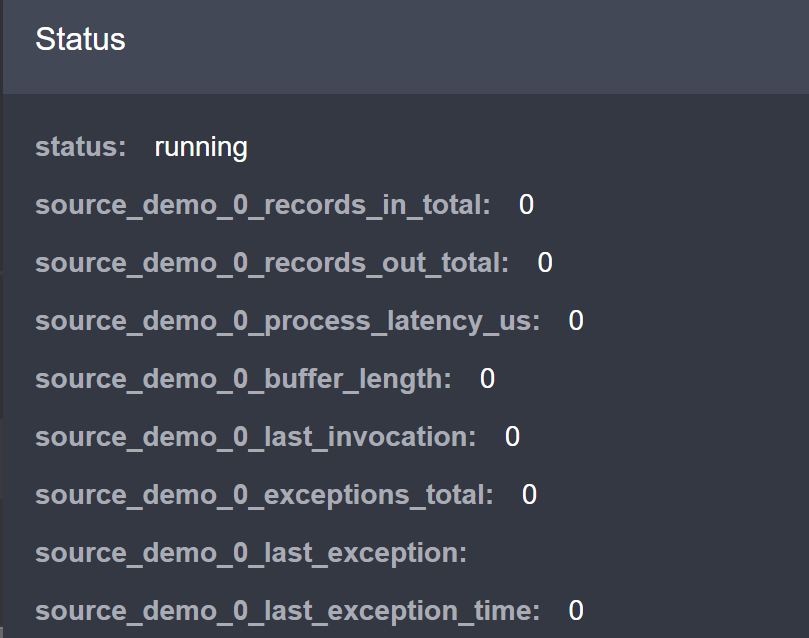
You can edit, duplicate and delete the rules by clicking the button in the Operations column.
Tag summary
Content type
Image
Digest
sha256:c852fe8ab…
Size
62.9 MB
Last updated
over 2 years ago
docker pull emqx/ekuiper-manager